
May 2024 S M T W T F S 1 2 3 4 5 6 7 8 9 10 11 12 13 14 15 16 17 18 19 20 21 22 23 24 25 26 27 28 29 30 31 Archives
Admin
Studying these verses in church and I always hear this whenever I read them (a good thing).
Posted in Uncategorized
Deactivated my Facebook
As an experiment I have deactivated my FB account. Interestingly, even if you deactivate your account, it preserves your account in case you want to come back, but it disables certain things like your profile photo. It leaves you in your friend’s friend lists, but makes you unsearchable.

A friend of mine noticed that I had deactivated my account and sent me this image of what I look like in his friend list. Apparently, when he clicks my name he gets this dialogue box explaining that my account has been deactivated and then hints that he can unfriend me (and gives a direct link to assist.) This strikes me as pretty funny. Either it is for people who are OCD and can’t stand having people in their friends list that actually aren’t active FB users, or FB is trying to find a way to punish me without outright saying it is doing so. E.g. when I decide to reactivate my account, I’ll find that what I did has somehow resulted in a bunch of friends unfriending me, so “I’ll never do that again!” or something.
Posted in Uncategorized
Dan Baker, the one man band
Just watched, and was mesmerized by this British musician who gave an excellent lesson on recording and mixing.
And then afterwards watched one of his full productions. So impressive!
Posted in Music
ji32k7au4a83
I read this and found it interesting today.
https://it.slashdot.org/story/19/03/05/203253/why-ji32k7au4a83-is-a-remarkably-common-password
I still check in on Slashdot probably every day. There is always something interesting there.
Posted in Tech
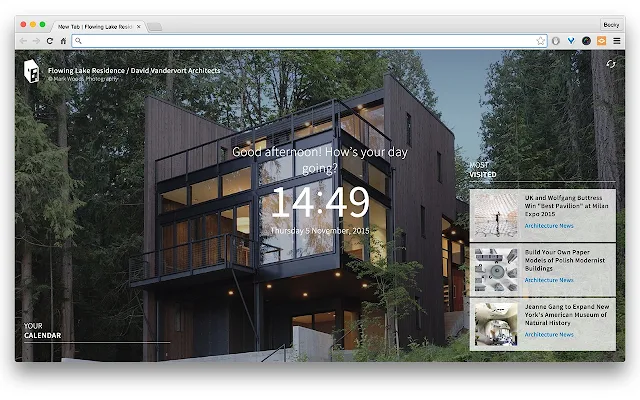
My new favorite Chrome Extension: ArchDaily
I try out various Chrome Extensions, and I have to say, the ArchDaily one is my new favorite. If you like interesting architecture, it is a fun way to see all kinds of interesting buildings and spaces from around the world. From the description:
Every time you open a new tab in your Chrome browser, we’ll show you a randomly selected photograph of an ArchDaily project. If you want to learn more about the project, you can easily click to see more pictures, drawings and information.
It also adds a clock to any new tab. It’s one extension I’ve kept installed.
Posted in Tech
Nikki Haley – excellent GOP response
http://www.cbsnews.com/live/video/sc-gov-nikki-haley-delivers-gop-response/
Also, her teeth are whiter than I thought was possible for teeth.
Posted in Uncategorized
Free app for finding duplicate files
I recently ran into an issue where my dropbox folder had over 8000 duplicate files in it, caused by some kind of syncing bug. I did not like the idea of having to go through and identify these manually, so I was very pleased when an app developer tipped me off to this excellent (and free) “dup” finder: https://dupeguru.voltaicideas.net/
Posted in Tech
